 I'm Andrew. I write code for Microsoft and do web stuff. Want to know more?
Check out the
I'm Andrew. I write code for Microsoft and do web stuff. Want to know more?
Check out the Look Ma! No GAC! Razor IntelliSense without GACing
If you’ve done any work with the open-source ASP.Net Web Stack (on Codeplex!) then you may have encountered one annoying issue: If you install an MVC 4 release, your source code version of MVC stops working. This is because our releases put the assemblies in the Global Assembly Cache, which is basically a special folder which overrides the Bin folder of your application. There are many reasons we do this, for example it is required if you are going to NGen an assembly. But specific reasons aside, the fact is that we install our assemblies in the GAC and that isn’t likely to change in “v2” (MVC4/WebPages2/Razor2). So, how can we start working around this problem?
WARNING: This is totally unsupported. I’m happy to help in the comments but if you call Product Support they won’t help you with this!
Step 0: Capture Binaries
Before you go uninstalling stuff, you should do one of these two things:
- Grab the assemblies necessary for VS BEFORE uninstalling OR
- Be prepared to build new ones from source
If you aren’t prepared to do #2, make sure you do #1! The Assemblies are in C:\Program Files (x86)\Microsoft ASP.Net. Here’s the full list of the ones you need, collect them and copy them into a separate folder (because Step 1 will delete them):
- System.Web.Razor.dll
- System.Web.WebPages.Razor.dll
- System.Web.WebPages.Deployment.dll
- System.Web.WebPages.dll
- System.Web.Mvc.dll
Step 1: UnGACing
The first step is simply to remove the assemblies from the GAC. We only need to remove the “V2” Assemblies (“V4” for MVC related assemblies) because the GAC’d copy of v1 (v3 for MVC) won’t interfere with a version you build from source. NOTE: This will put Razor IntelliSense and other Visual Studio features relating to MVC in a somewhat broken state, but we’ll fix that in Step 2.
The first thing you might notice if you try to remove our assemblies from the GAC in the “usual” way is that they are locked by Windows Installer:
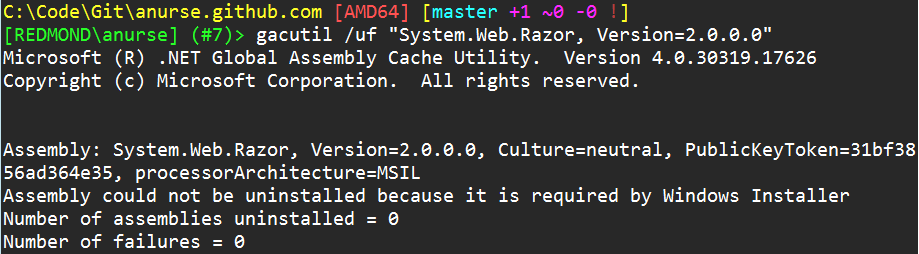
Ok, that kinda sucks. But fortunately this actually works to our benefit because we can use Windows Installer to remove the assemblies for us! If you installed MVC4/WebPages2 for Visual Studio 2010, this is easy, just go to Add/Remove Programs and uninstall the following two entries: “Microsoft ASP.Net MVC 4 Runtime” and “Microsoft ASP.Net WebPages 2 Runtime”. DO NOT remove the matching Visual Studio tools entries!
If you installed Visual Studio 2012, we don’t actually add our individual components to the Add/Remove Programs list in order to give you just one thing to uninstall (Visual Studio 2012). But, you can still uninstall our components! It just takes a little PowerShell Magic. So, open up an Admin PowerShell prompt (don’t worry, these are all built-in commands so copy-paste away)
First, run this command to uninstall ASP.Net MVC 4:
gwmi Win32_Product | where { $_.Name -eq "Microsoft ASP.Net MVC 4 Runtime" } | ForEach { $msi = Convert-Path "$($_.InstallSource)\*.msi"; msiexec /x $msi }Click through the prompts and click “Yes” when you are asked to confirm even though 1 or more products will stop working (that’s VS ;)). Then, run a slightly different script to remove ASP.Net Web Pages 2 (which includes Razor):
gwmi Win32_Product | where { $_.Name -eq "Microsoft ASP.Net Web Pages 2 Runtime" } | ForEach { $msi = Convert-Path "$($_.InstallSource)\*.msi"; msiexec /x $msi }Step 2: Fixing VS.
Now, some of the VS tooling will be broken :(. Pretty much just Razor IntelliSense but that’s one of the best features! (Though I may be biased ;)). VS tries to load System.Web.Razor (and some other friends) in order to parse Razor documents, but in Step 1, we removed it from the GAC and VS doesn’t have a local copy, so it doesn’t know where to find them!
The fix for this is simple: Give VS a local copy! So, first grab the binaries from Step 0 (if you collected them), or build new binaries from our source code (just follow the steps on our CodePlex site and then grab the binaries from the bin folder). Then, copy them to the following folder:
C:\Program Files (x86)\Microsoft Visual Studio 11.0\Common7\IDE\PrivateAssembliesOf course, replace “Program Files (x86)” with “Program Files” if you’re on a 32-bit OS. And replace “Microsoft Visual Studio 11.0” with “Microsoft Visual Studio 2010” if you’re using VS 2010. Restart VS and you should have IntelliSense! If you run in to issues, try building your project and restarting VS.
Wrapping up
That should be it! Now, please note that this is very unsupported. It works, but if you bork your VS installation, you’re on your own. Ok, not totally on your own, I’m happy to try helping in the comments, but don’t call support because they won’t help you with this!
If you get totally screwed, then you can either: repair VS if you’re using VS 2012, or reinstall MVC 4 if you’re using VS 2010. That should put you back in a known state.